The Location feature allows the authorized user to efficiently add and manage the locations for the respective clients within the QEval system. Administrators can seamlessly add new locations, effortlessly locate the existing ones, and make necessary adjustments or removals as needed. The users can map the location in the program and same can be seen in the evaluation.
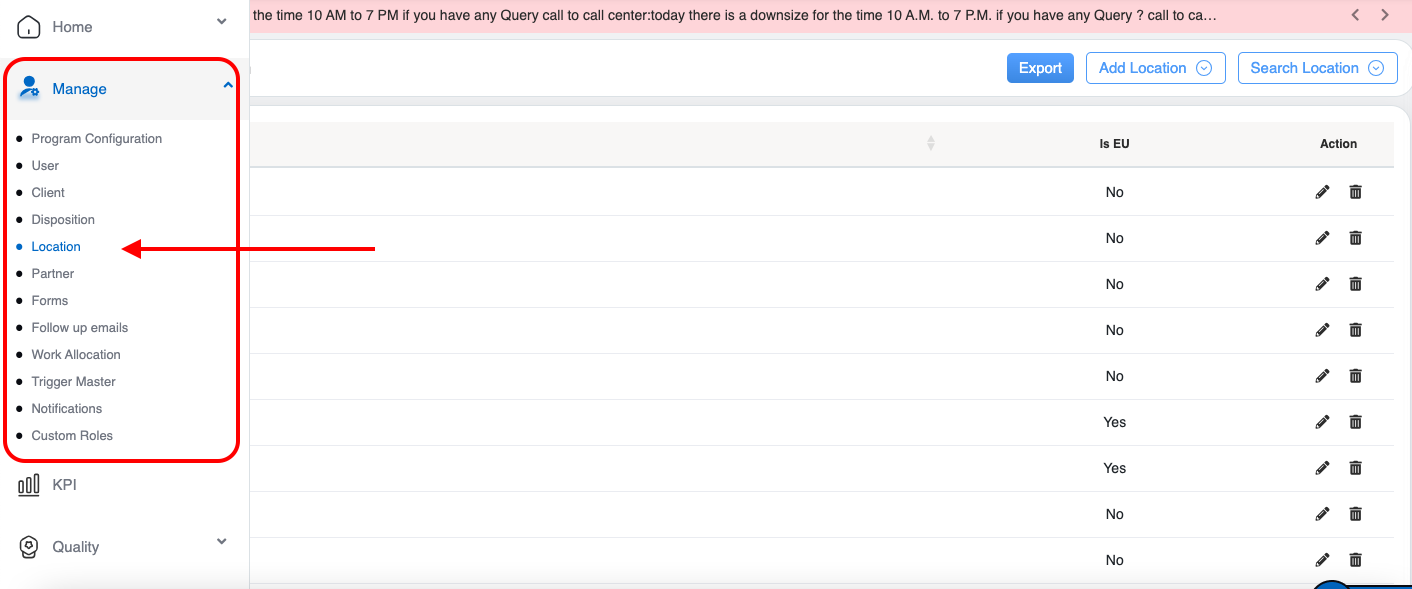
To access this feature, click on the Menu ![]() button or move the mouse on the left side of the page to open the Menu Bar. Click on the Manage
button or move the mouse on the left side of the page to open the Menu Bar. Click on the Manage ![]() and then select Location option as shown below:
and then select Location option as shown below:
The user will be directed to the Manage Location page. This page displays the list of all the locations that are added in the QEval System as shown below:
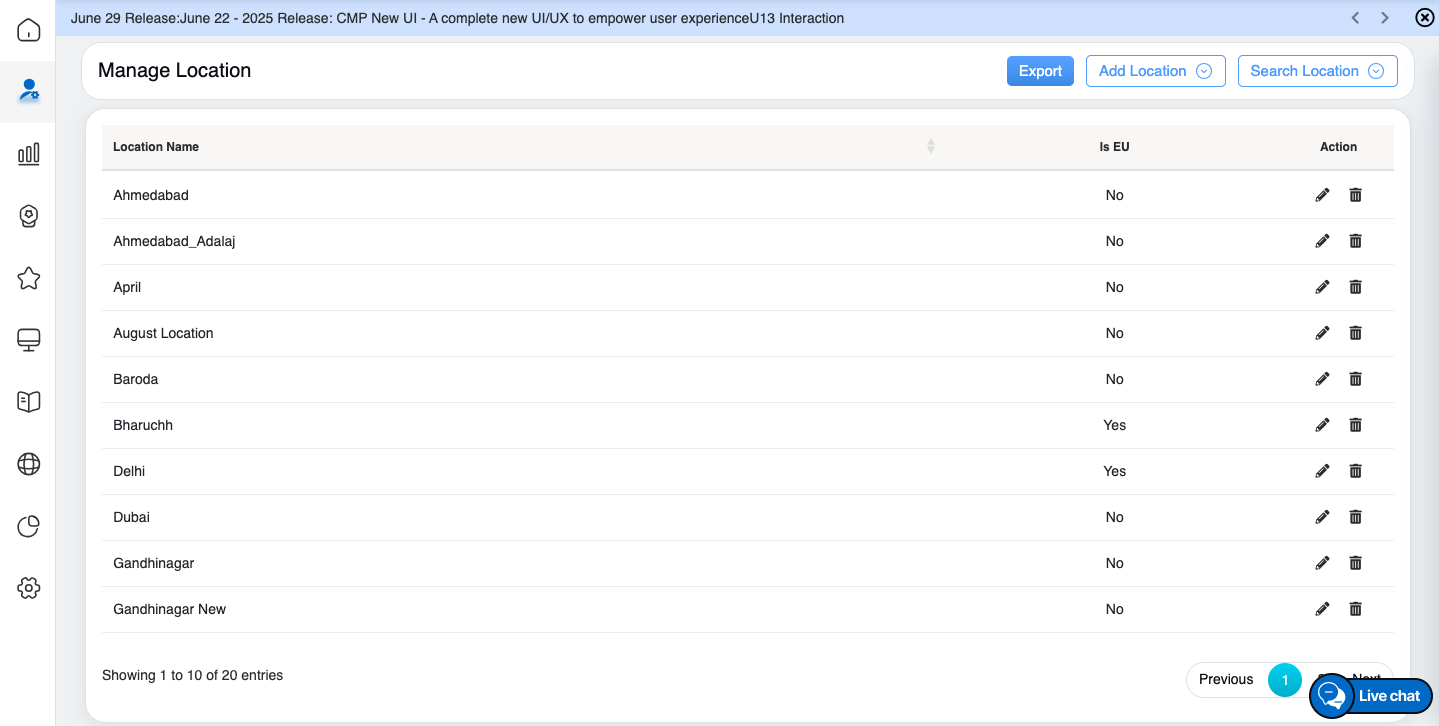
Manage Location tab
On the Manage Location page, the logged-in user will be able to access the mentioned below functionalities:
Add Location
The Add Location feature allows the authorized user to add new locations of the clients within the QEval system. This helps to determine the clients for the same location.
To access this functionality, click on the Add Location button displayed on the Manage Location page as highlighted in the screen below:
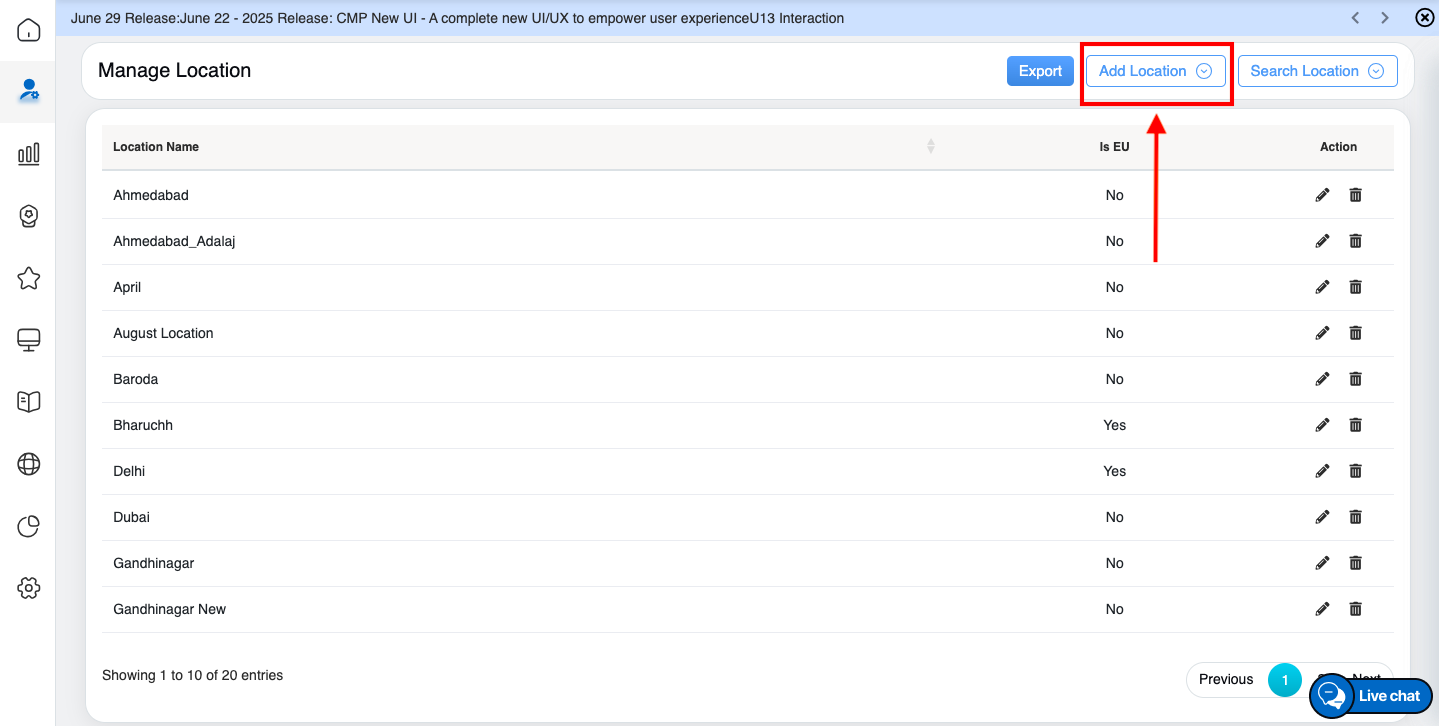
Add Location button
The Add Location window will be opened on the same page as shown below:
- Enter the name of the location in the text-box displayed under Location Name field.
- Select the Is EU? Checkbox if the entered location is situated in one of the European Countries.
Once the location details are entered, click on the Submit button to add the new location, or click on the Reset button to reset the fields, or click on the Cross ![]() button to discard the process.
button to discard the process.
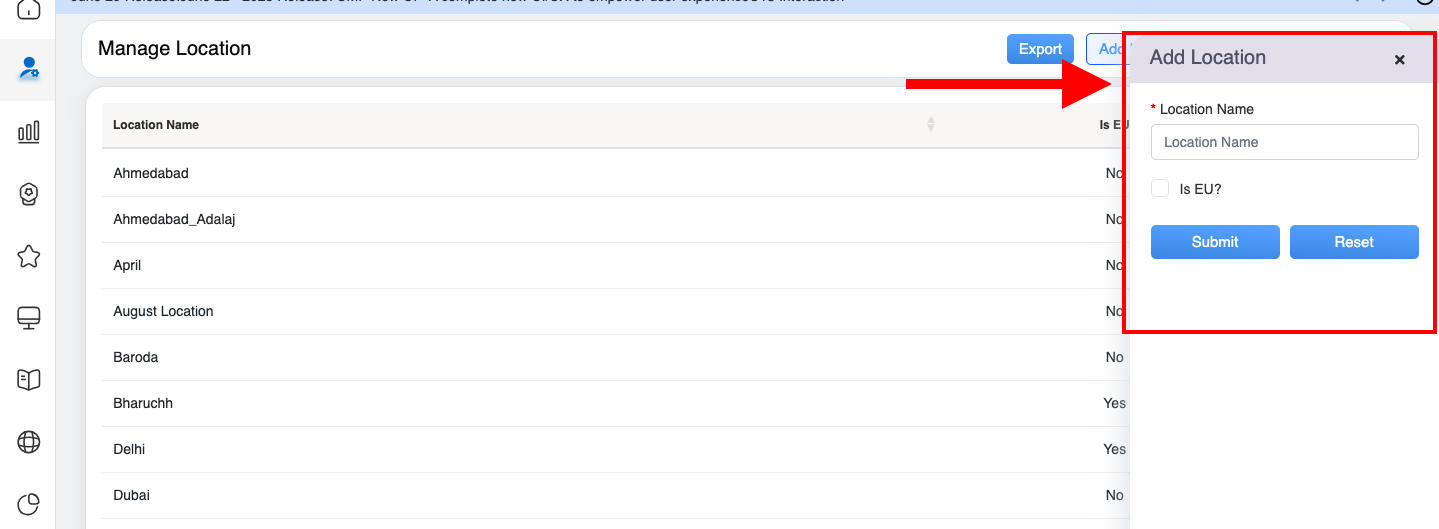
Add Location tab
An acknowledgment message will be displayed on the screen. The authorized user will be directed to the Manage Location page and the location will be added in the QEval system.
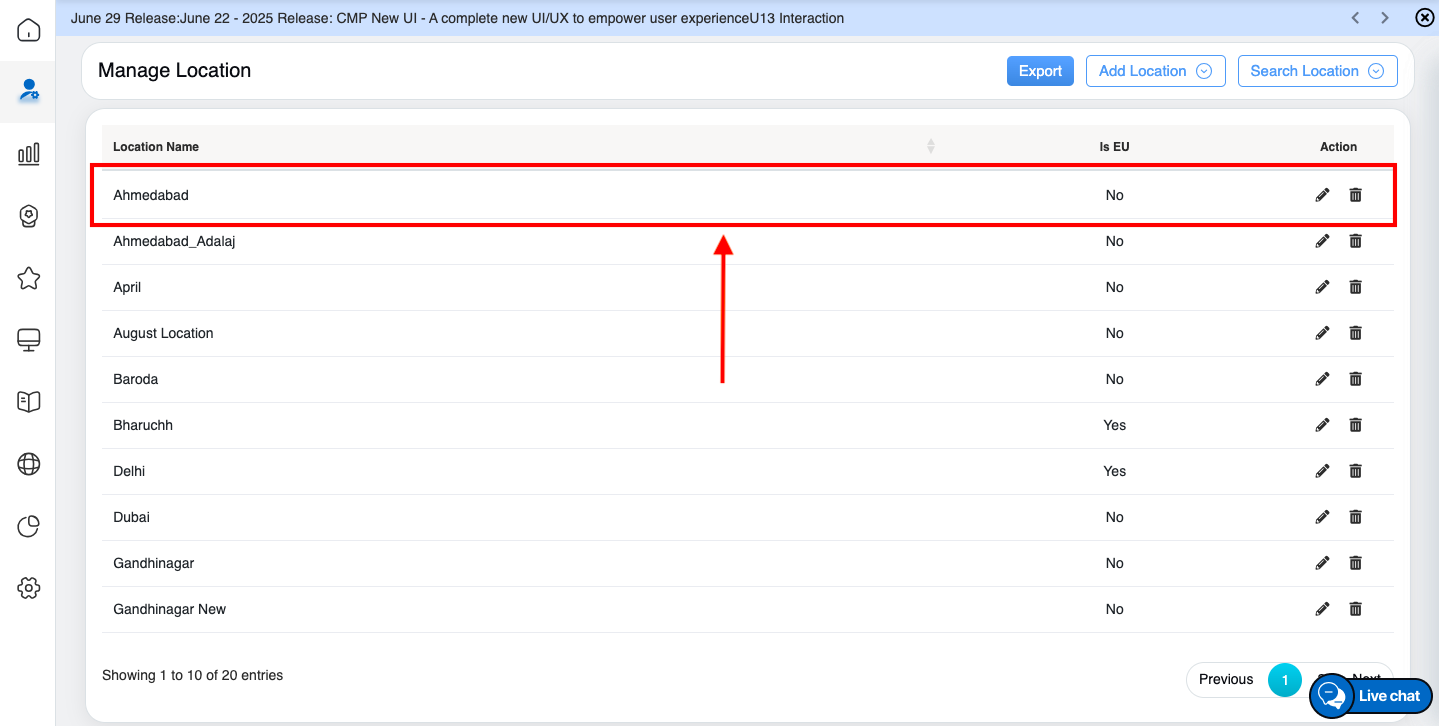
Manage Location tab
Note: Once the new location is added in the QEval system, it allows the users to select multiple locations while managing the program. Once the location is selected the program, it will reflect in the evaluation under location field.
The data elements displayed in the table grid are explained below:
| Table Elements | Description |
| Location Name | Displays the name of the location added in the system. |
| Is EU | Displays whether the added location is situated in the European Country or not. |
| Action |
The Edit The Delete |
Search Location
The Search Location feature helps the authorized user to search all the location details or all the client’s specific location details.
To access this functionality, click on the Search Location button displayed on the Manage Location page as highlighted in the screen below:
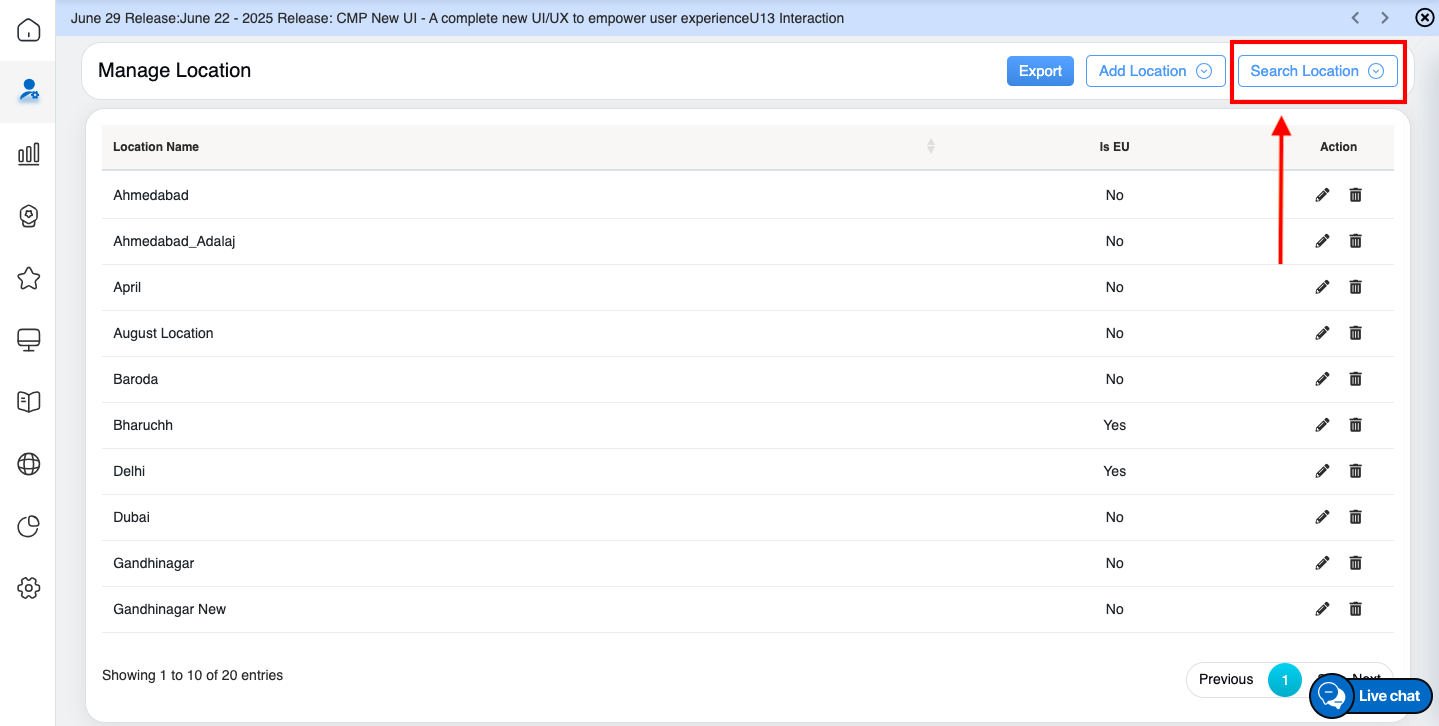
Search Location button
The Search Location window will be opened on the same page.
The Location drop-down menu displays the list of added location, select the specific location name from the drop-down list to search the location details. One can also search the name of the location by entering the keywords in the Search Bar Text-Box displayed under the drop-down menu.
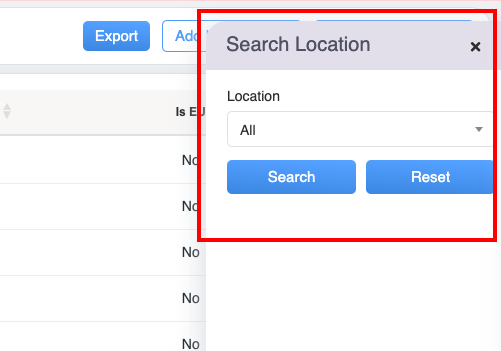
Search Location tab
After selecting the specific location name from the list, click on the Search button to search the location details or click on the Reset button to rest the fields.
Based on the applied search filters, the location details will be displayed on the Manage Location page table grid.
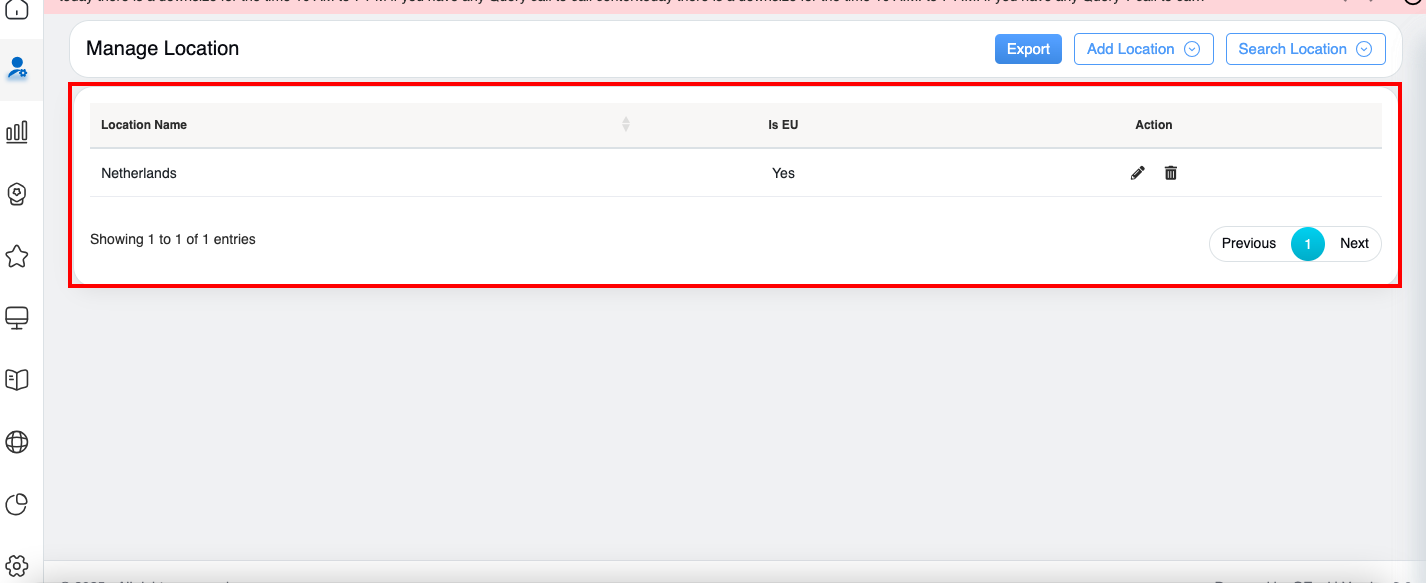
Manage Location tab
The data elements displayed in the table grid are explained below:
| Table Elements | Description |
| Location Name | Displays the name of the location added in the system. |
| Is EU | Displays whether the added location is situated in the European Country or not. |
| Action |
The Edit The Delete |
Edit Location
On the Manage Location page, the authorized user can edit and modify the location details.
To access this functionality, click on the Edit ![]() button displayed under the Action column as highlighted in the screen below:
button displayed under the Action column as highlighted in the screen below:
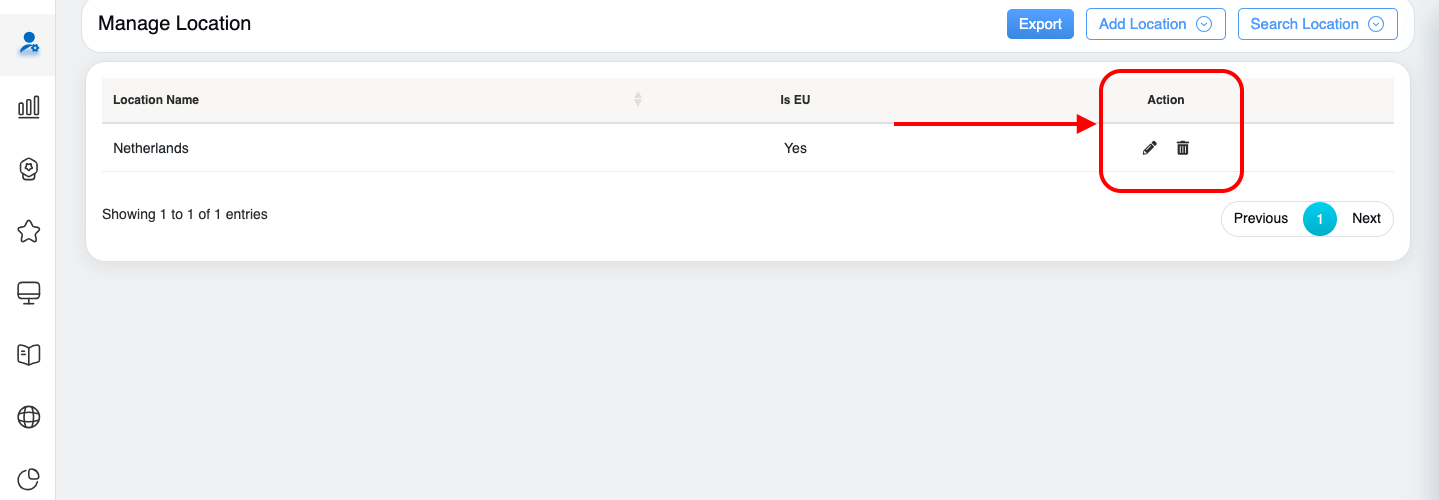
Action button> Edit button
The Edit Location window will be displayed on the same page where the authorized user can modify the location details (Refer to Add Location for details). After modifying the details, click on the Update button to save the changes or click on the Cancel button to discard the process.
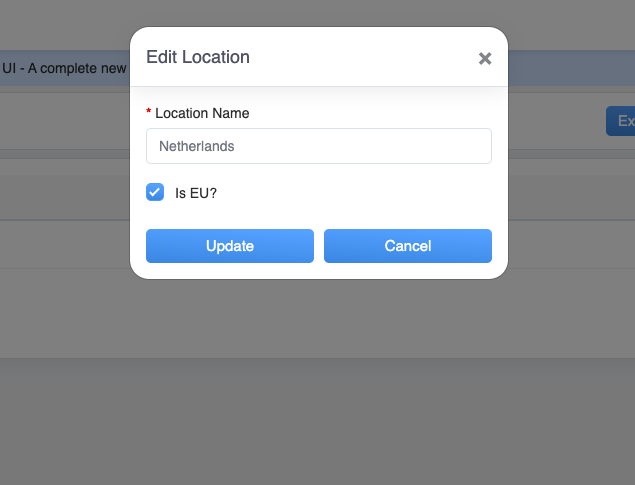
Edit Location tab
An acknowledgment message will be displayed on the screen and the specific location details will be updated. Then, The user will be directed to the Manage Location page and specific location details will be modified and updated in the table grid.

Manage Location tab
Delete Location
On the Manage Location page, the authorized user can delete the specific location details from the QEval system.
To access this functionality, click on the Delete ![]() button displayed under the Action column as highlighted in the screen below:
button displayed under the Action column as highlighted in the screen below:

. Action button > Delete button
A confirmation message will be displayed on the screen. Click on the Yes button to delete the specific location details or click on the No button to discard the process.
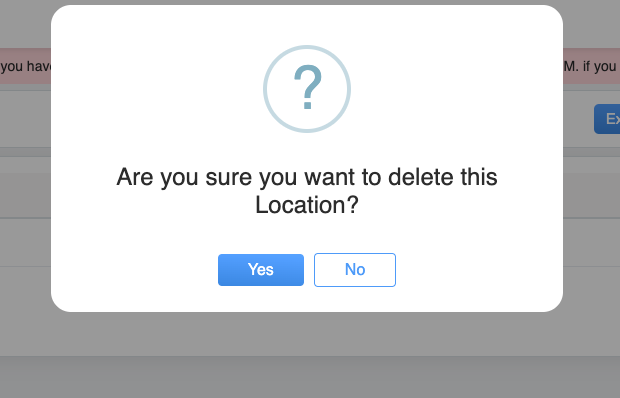
Confirmation message
Notes:
- One cannot delete a location detail if it is used somewhere.
- One needs to delete the associated program/user/form and then can delete the required location.
- If the location is used anywhere in the QEval system, then the system will generate an error message: “You cannot delete the location which is in use.”
When the specific location is not used anywhere in the QEval System, then an acknowledgment message will be displayed on the screen and the location details will be deleted permanently from the database.
Export
One can export the client details in Excel format. To do so, click on the Export button. The file will be exported to the local system in the excel format.
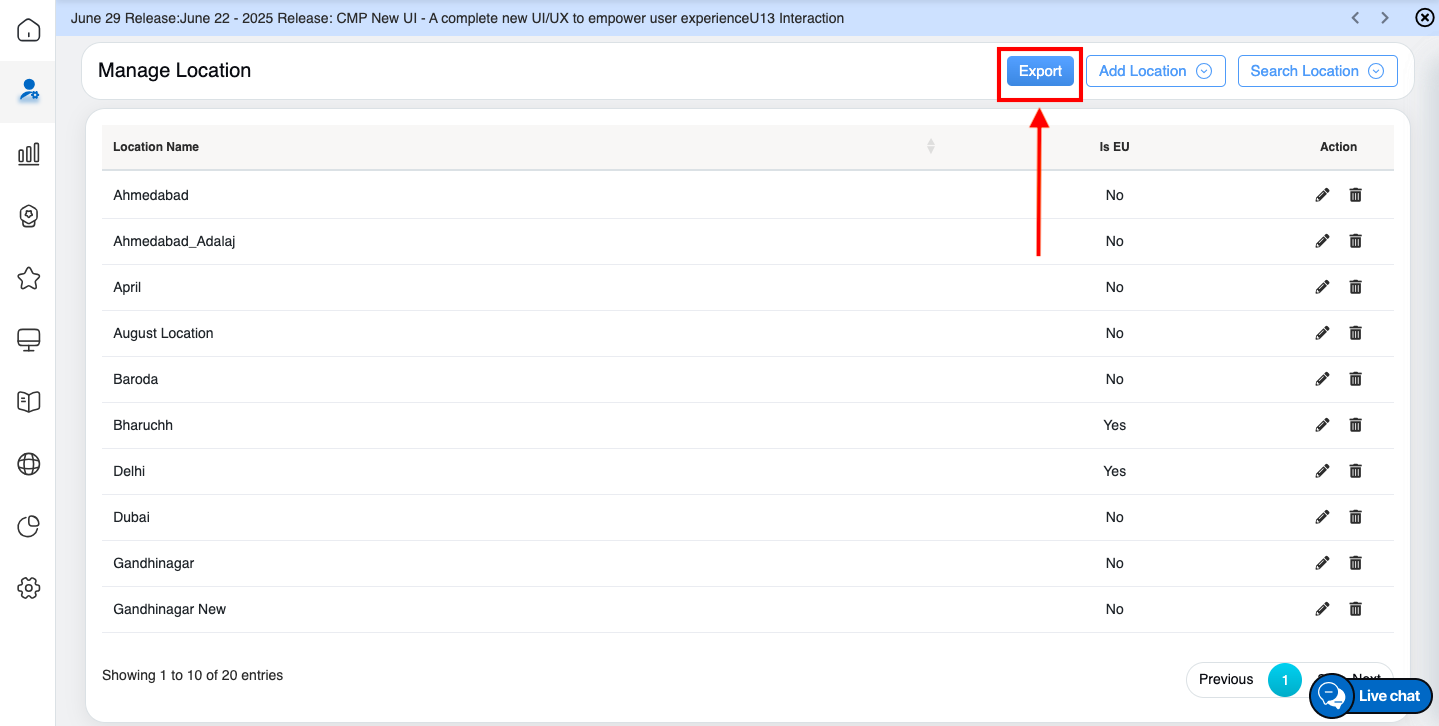
Export button
Video