The Disposition is a feature that is used by the agent to dispose the call. QA Verifier can select the disposition from the dropdown list in the evaluation. The client can filter the report based on disposition to get the outcome of the agent as well as getting business outcome. It also allows the client can also track and monitor call outcomes, gain valuable intelligence that can be used to optimize the team’s process. The authorized users can seamlessly add new dispositions, effortlessly modify, search, and delete the existing disposition.
To access this feature, click on the Menu ![]() button or move the mouse on the left side of the page to open the Menu Bar. Click on the Manage
button or move the mouse on the left side of the page to open the Menu Bar. Click on the Manage ![]() and then select Disposition option as shown below:
and then select Disposition option as shown below:
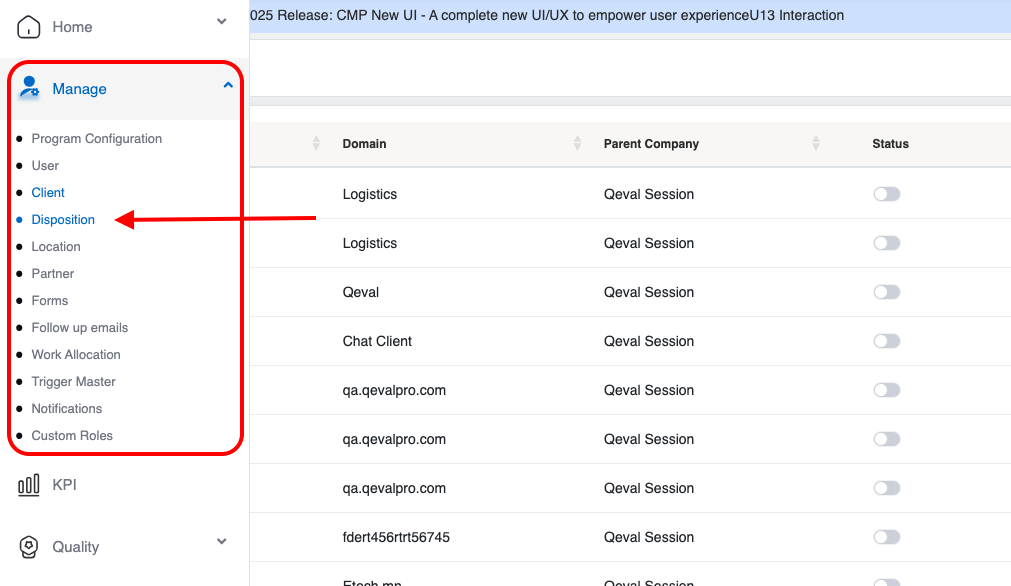
Menu tab
The user will be directed to the Manage Disposition page. This page displays the list of all added active disposition details as shown below:
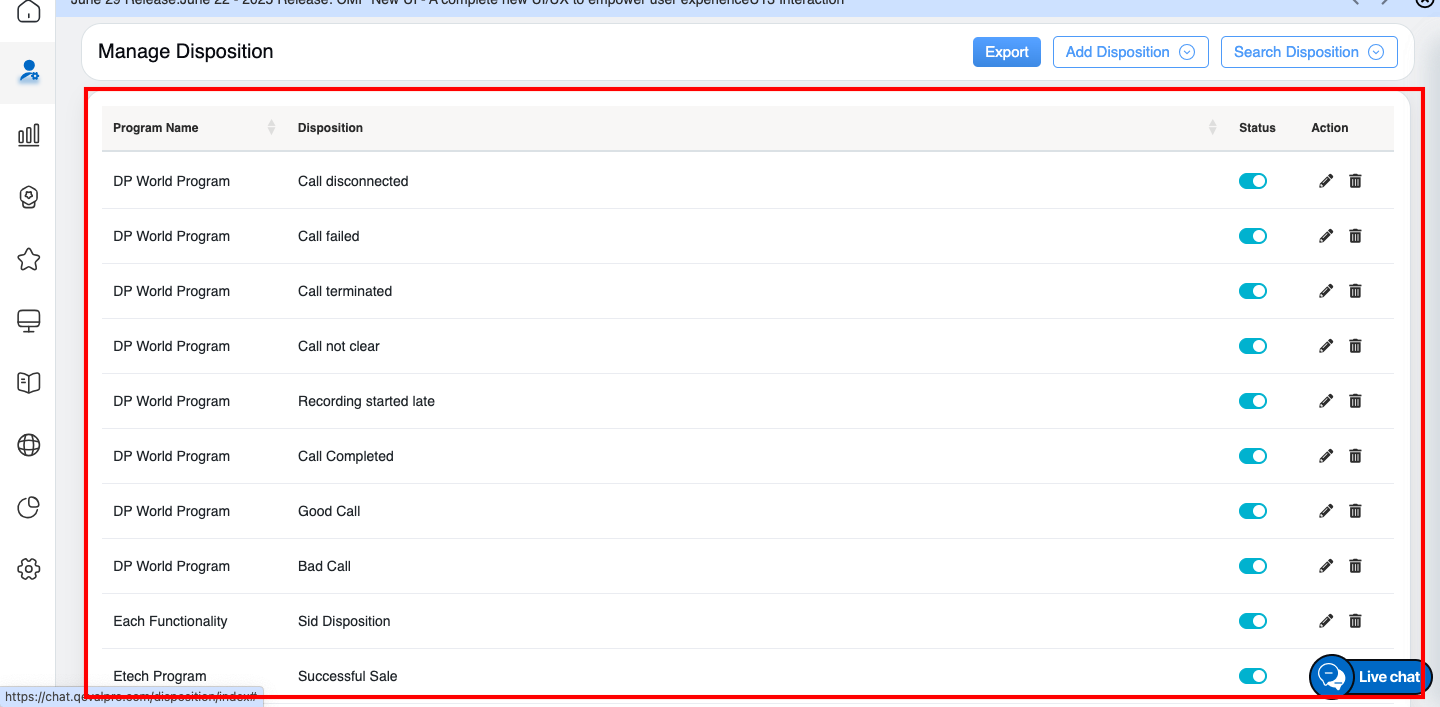
Manage Disposition Tab
On the Manage Disposition page, the logged-in user will be able to access the mentioned below functionalities:
Add Disposition
The authorized user can Add Disposition for a specific program in QEval system. The page also allows the authorized user to provide certain functionalities for specific or all the dispositions.
To access this feature, click on the Add Disposition button displayed on the Manage Disposition page as highlighted in the screen below:
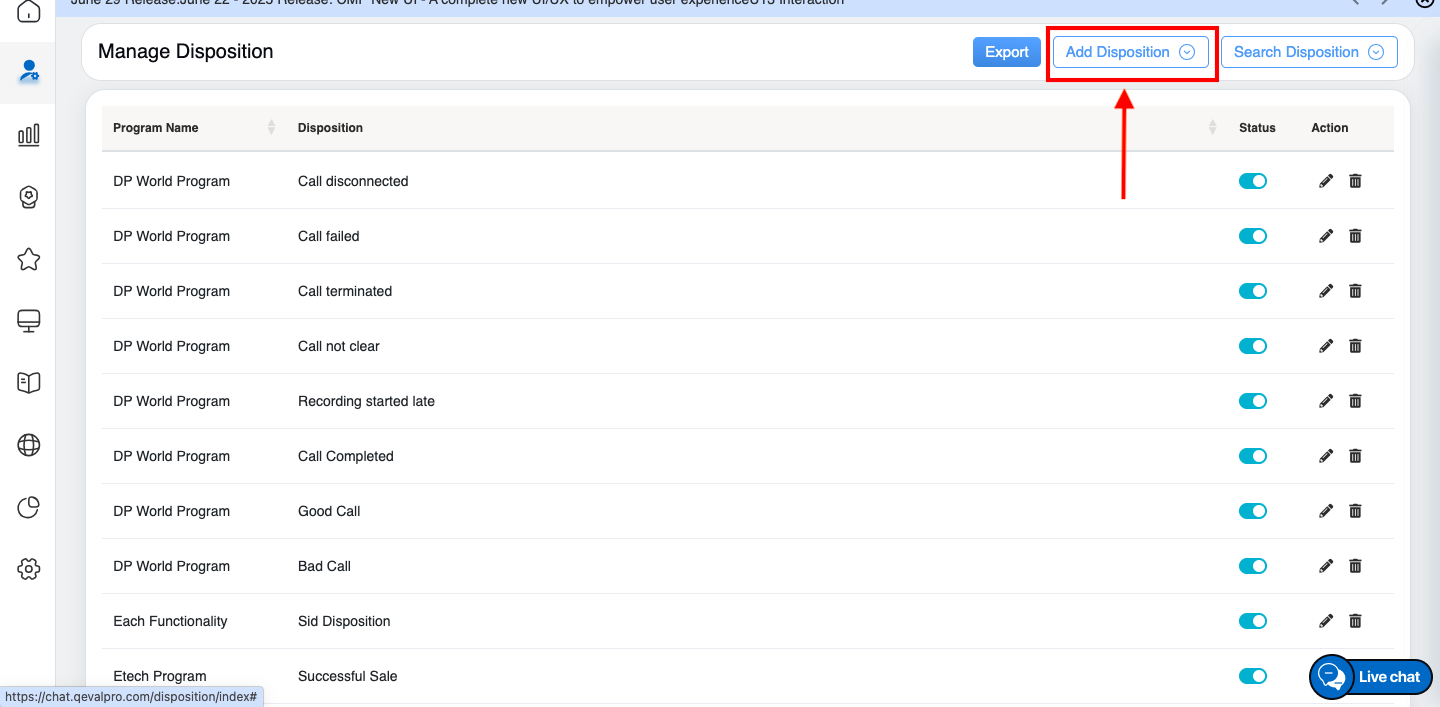
Add Disposition button
The Add Disposition window will be opened on the same page.
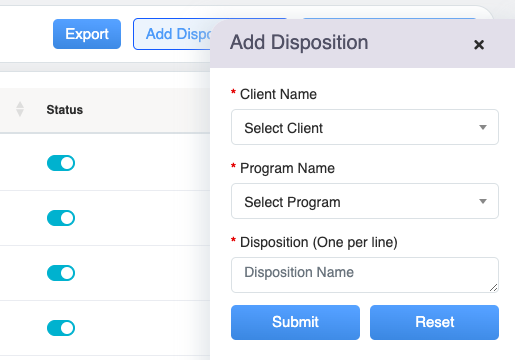
Add Disposition Tab
Provide the following details to Add Disposition.
- From the Client Name drop-down menu displays the list of clients. Select the name of the client from the list. One can also search for the client’s name by entering the keywords in the Search Bar Text-Box displayed under the drop-down field.
- The Program Name drop-down menu shows the list of program names based on the selected client name. Select the name of the program from this list. One can also search the name of the program by entering keywords in the Search Bar Text-Box displayed under the drop-down field.
- Enter the disposition name under the Disposition Text-Box field. The user can also enter multiple disposition names by pressing the enter key. Each disposition name will be displayed one by one in the vertical list format.
Once the necessary details are configured, click on the Submit button to add the disposition details or click on the Reset button to reset the configured fields or click on the Cross button to discard the process. An acknowledgment message will be displayed on the same page, and the new disposition will be added.
The user will be directed to the Manage Disposition page and the newly added disposition will be displayed in the table grid and by default the status of the program will be Active:

Manage Disposition Tab
The data elements displayed in the table grid are explained below:
| Table Elements | Description |
| Program Name | Displays the name of the program. |
| Disposition | Displays the name of the disposition. |
| Status |
The status of the disposition whether it is active or inactive is displayed. The toggle button allows users to change the Active disposition to Inactive and vice versa.
(Refer to Search Disposition to search active or inactive disposition details.) |
| Action |
The Edit The Delete |
Search Disposition
A search disposition functionality helps an admin to search active or inactive dispositions.
A Search Disposition helps the logged-in user to search active or inactive dispositions from the QEval system. The logged-in user has the option to search all the clients for a specific disposition or to search all the dispositions.
To access this functionality, click on the Search Disposition button available on the Manage Disposition page as highlighted in the screen below:
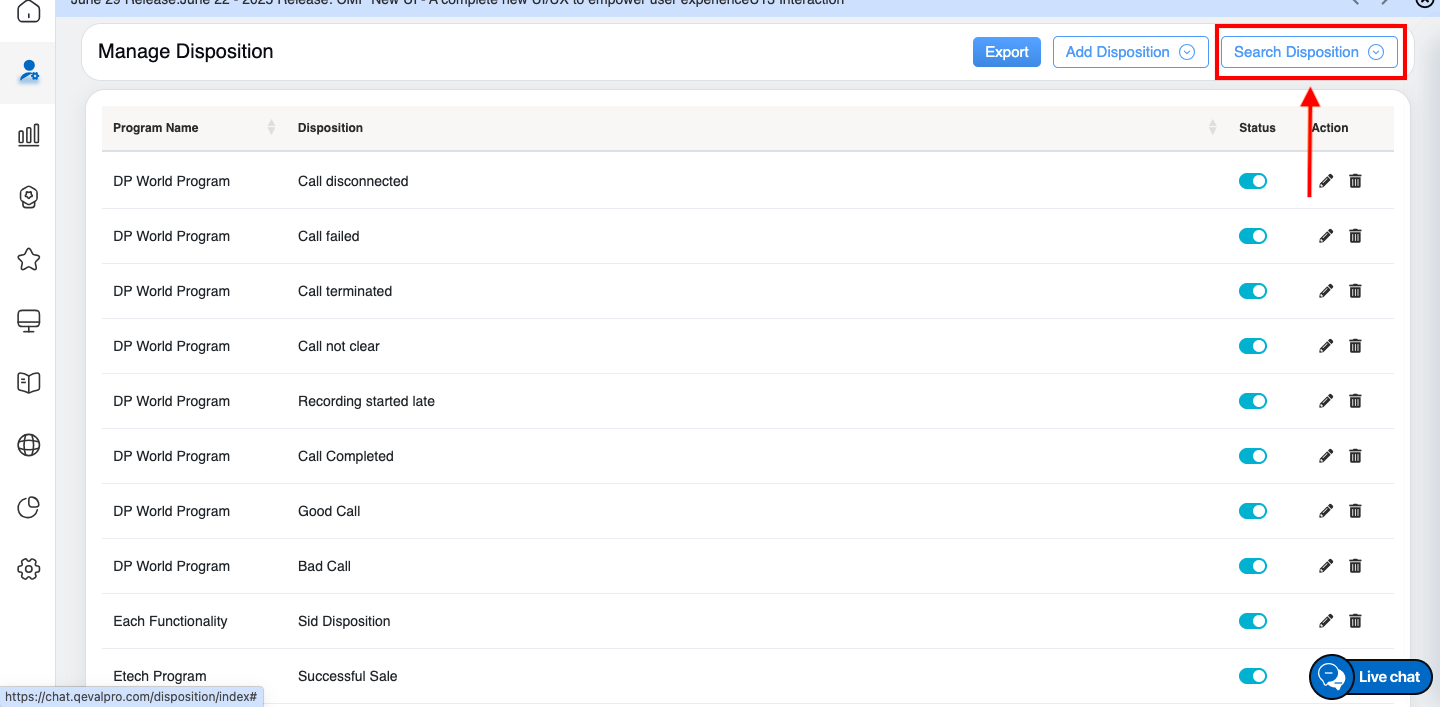
Search Disposition button
The Search Disposition window will be opened on the same page. The window displays the search criteria based on which the logged-in user can search for the specific active or inactive disposition.
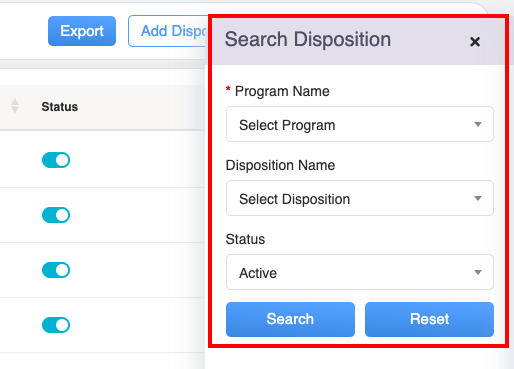
Search Disposition Tab
The disposition can be searched by following mentioned below steps:
- From the Program Name drop-down menu displays the list of programs. Select the name of the program from the list. One can also search for the name of the program by entering keywords in the Search Bar textbox displayed under the drop-down field.
- From the Disposition Name drop-down menu displays the list of added dispositions based on the selected program name. Select the disposition name from the list. One can search the added disposition name by entering the keyword in the Search Bar text-box displayed under the drop-down field.
- To search Active dispositions, click on the Status drop-down menu and then select Active option. (Refer to Edit Disposition to change Active to Inactive disposition).
Once the necessary details are configured, click on the Submit button to Search the disposition details or click on the Reset button to reset the configured fields. Based on the selected criteria, the search results of Active dispositions will be displayed in the table grid as shown below:
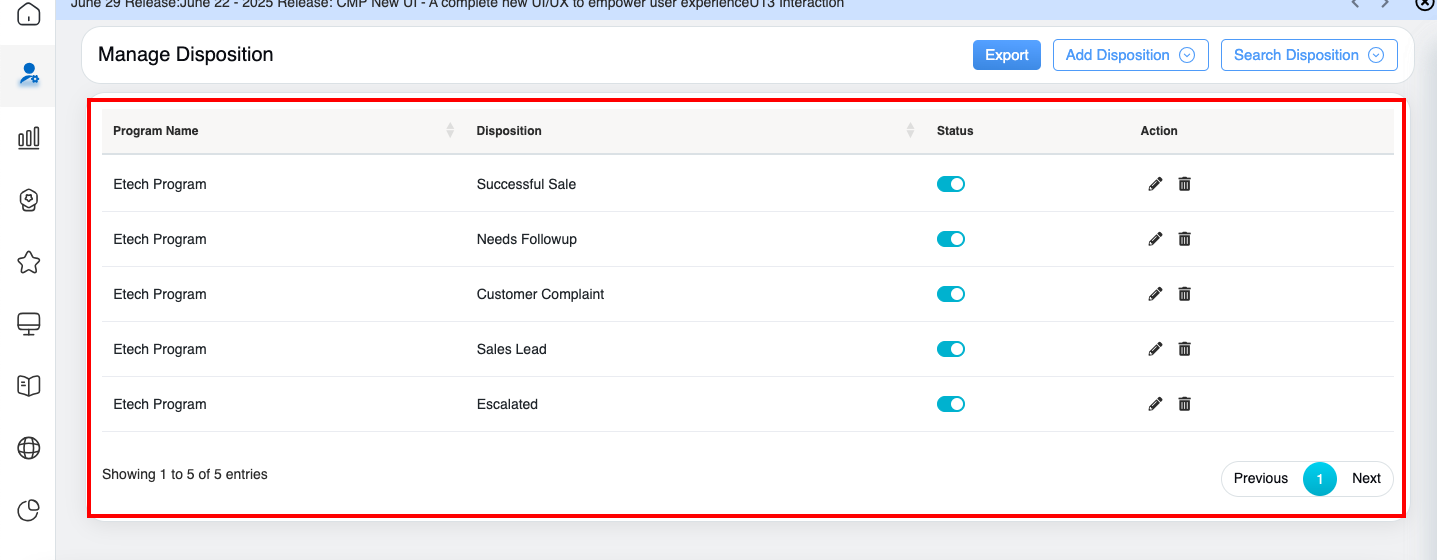
Manage Disposition Tab
To change the specific disposition status from Active to Inactive, click on the Active ![]() toggle button displayed under the Status column. An acknowledgment message will be displayed, and the selected disposition status will be changed to inactive.
toggle button displayed under the Status column. An acknowledgment message will be displayed, and the selected disposition status will be changed to inactive.
The Inactive disposition can be searched based on selected criteria – Program Name, Disposition Name or any combination of any selected criteria, and from Status drop-down menu select the Inactive option.
Once the necessary details are configured, click on the Search button to search inactive dispositions or click on the Reset button to reset the configured details. (Refer to Edit Disposition to change to Active dispositions.)
Based on the selected criteria, the search results of Inactive dispositions will be displayed in the table grid as shown below:
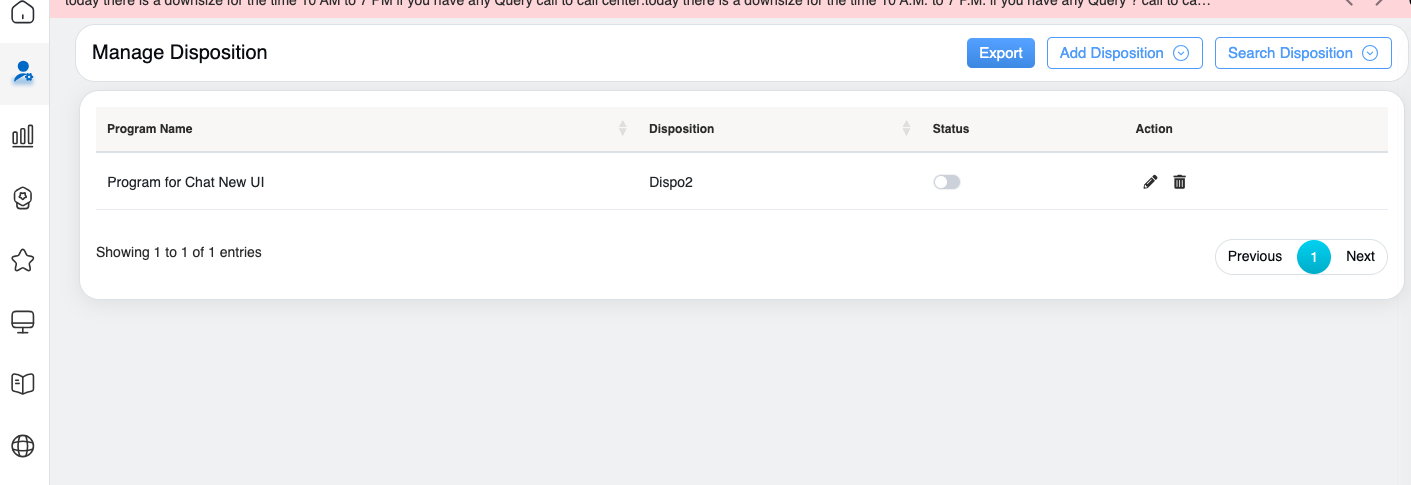
Manage Disposition Tab (Inactive status searched)
To change the specific disposition status from Inactive to Active, click on the Inactive ![]() toggle button displayed under the Status column. An acknowledgment message will be displayed, and the selected disposition status will be changed to active.
toggle button displayed under the Status column. An acknowledgment message will be displayed, and the selected disposition status will be changed to active.
The data elements displayed in the table grid are explained below:
| Table Elements | Description |
| Program Name | Displays the name of the program. |
| Disposition | Displays the name of the disposition. |
| Status |
The status of the disposition whether it is active or inactive is displayed. The toggle button allows users to change the Active disposition to Inactive and vice versa.
(Refer to Search Disposition to search active or inactive disposition details.) |
| Action |
The Edit The Delete |
Edit Disposition
On the Manage Disposition page, the authorized user can edit the added active or inactive disposition details.
To access this functionality, click on the Edit ![]() button displayed under the Action column as highlighted in the screen below:
button displayed under the Action column as highlighted in the screen below:
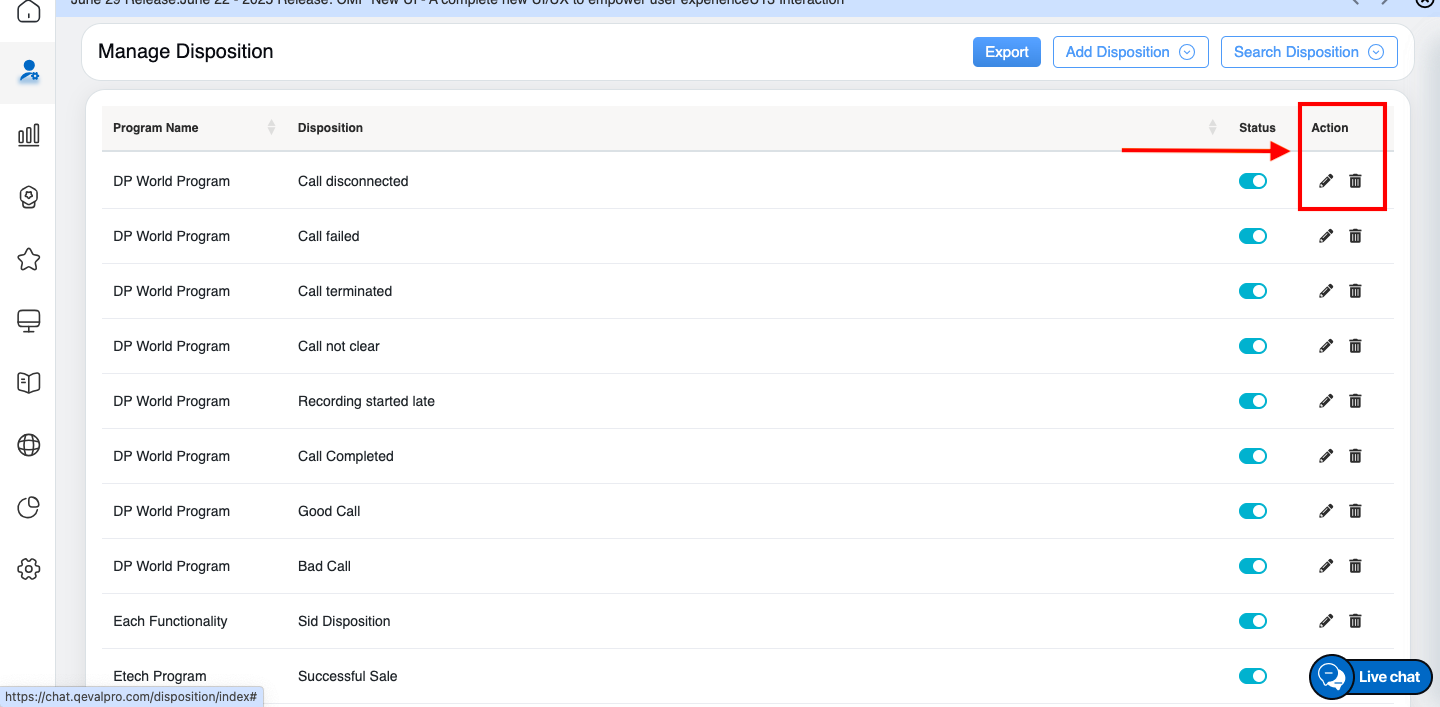
Action button > Edit button
Note: By default the Active Disposition details will be displayed on the page. Refer to Search Disposition for getting inactive disposition details.
The Edit Disposition window will be opened on the same page. Here the logged-in user can modify and change the already added disposition details. (Refer to Add Disposition for understanding the field details.)
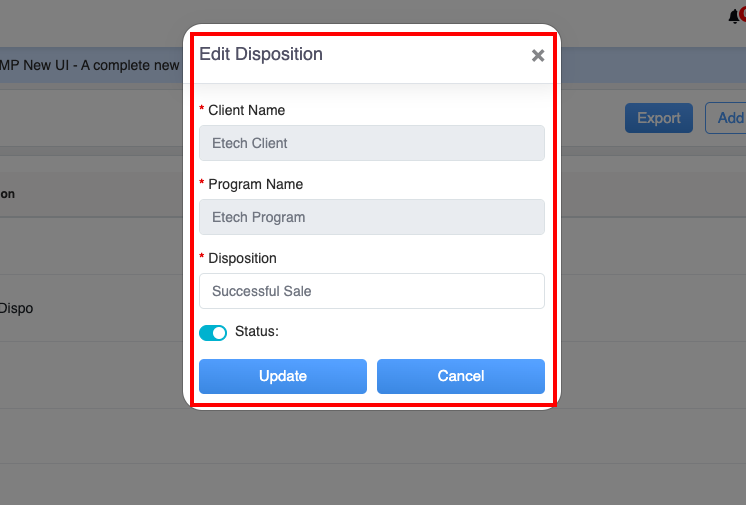
Edit Disposition Tab
To change the status of the specific disposition from Active to Inactive or vice-versa by clicking on the Status toggle button. Once the necessary modifications are done for specific disposition, click on the Update button to save the changes, or click on the Cancel button to discard the changes.
After updating the disposition, an acknowledgment message will be displayed as shown below:
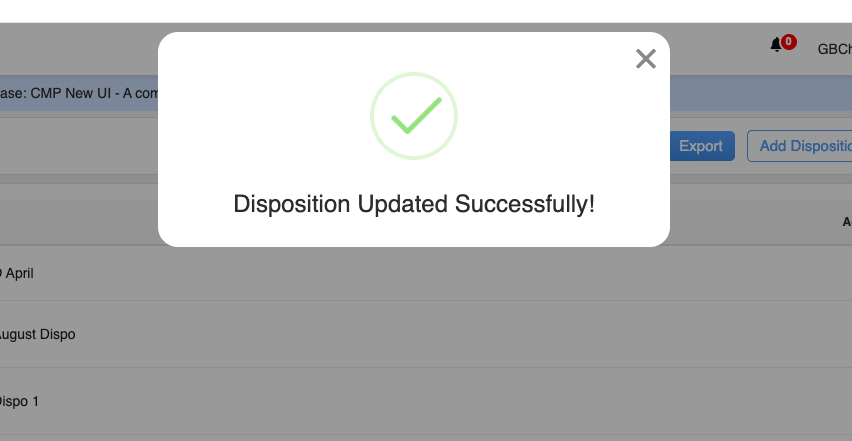
Acknowledgment message
The user will be directed to the Manage Disposition page and the specific disposition details will be updated and displayed in the table grid.
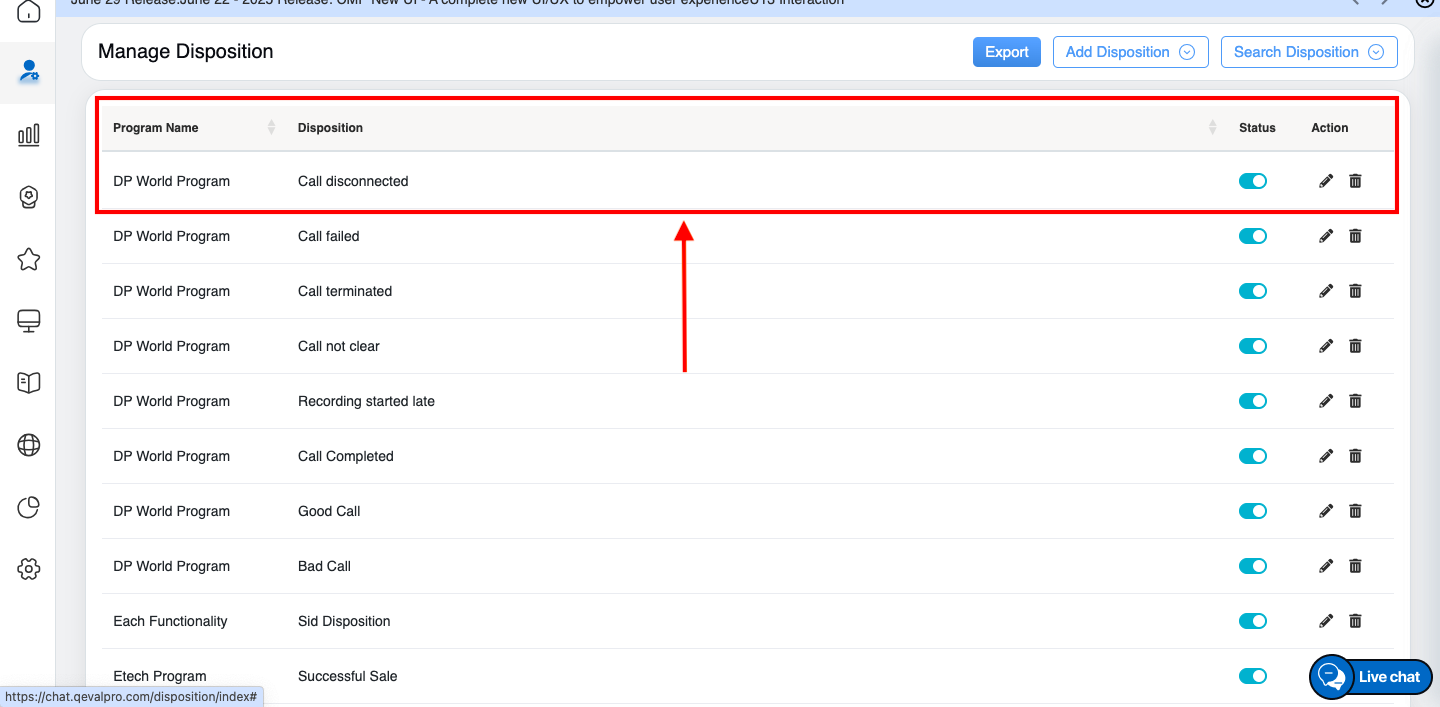
Manage Disposition Tab
Delete Disposition
On the Manage Disposition page, the authorized user can delete the disposition details from the QEval system.
To access this functionality, click on the Delete ![]() button displayed under the Action column as highlighted in the screen below:
button displayed under the Action column as highlighted in the screen below:

Action button > Delete button
A confirmation message will be displayed on the same page. Click on Yes button to delete the selected disposition or click on No button to discard this process.
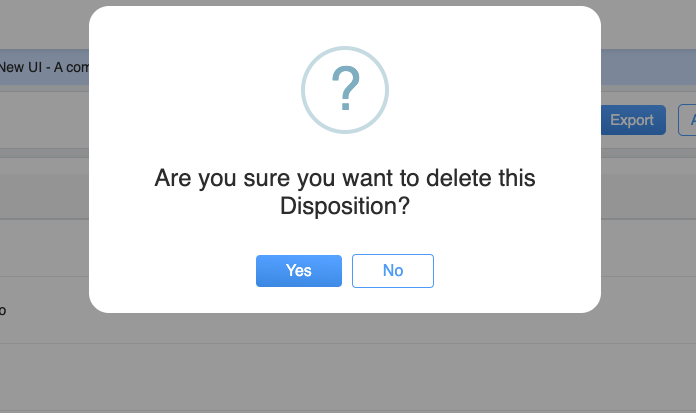
Confirmation message
An acknowledgment message will be displayed, and the specific disposition will be permanently deleted from the QEval system.
Export
One can export the disposition details in Excel format. To do so, click on the Export button. The file will be exported to the local system in the excel format.
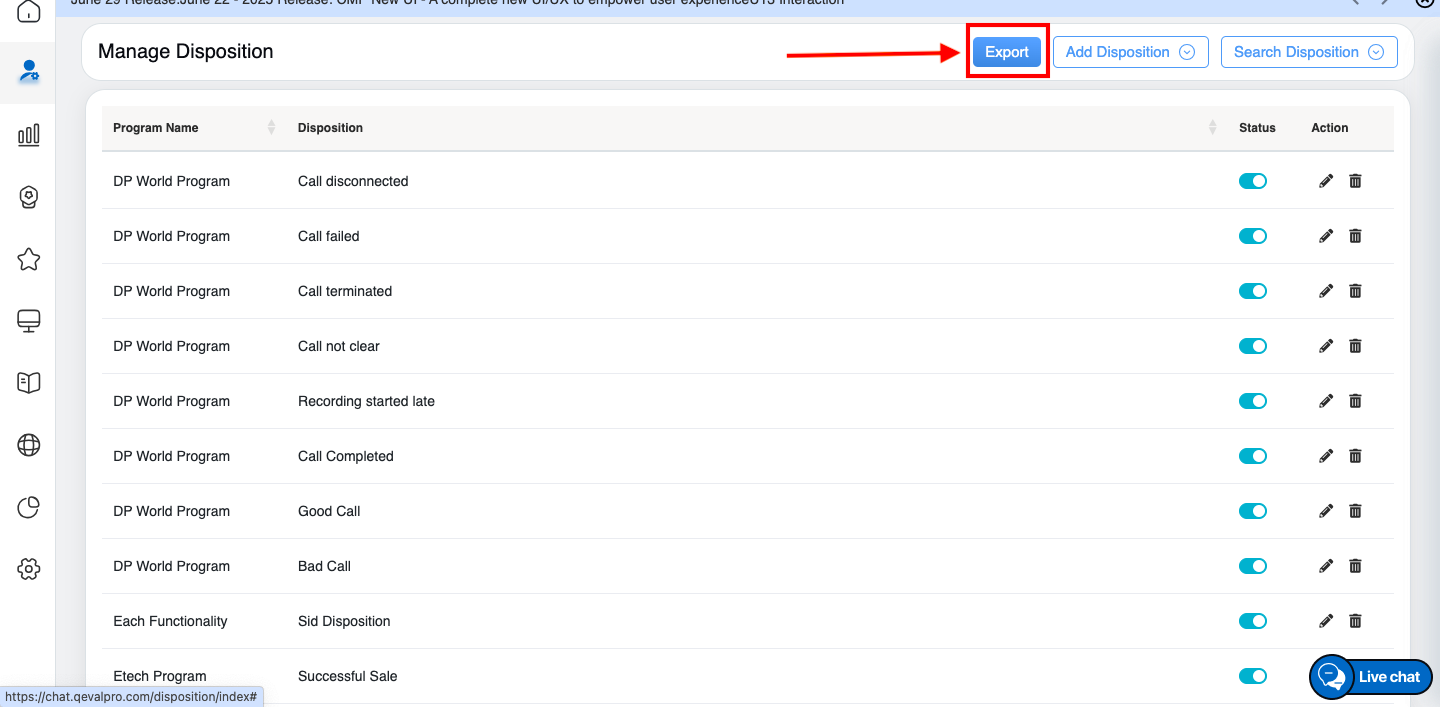
Export button
Video